Fall

Fall
My Favorite Time of the Year
Showing posts with label Vegetarian Entrees. Show all posts

Sunday, July 19, 2015

Hummus (2)

This is a new and improved hummus recipe. It is improved as I have learned a way to improve the texture of the hummus so that it is not so grainy. Its different in that it has different ingredients and a cleaner taste. Both recipes on my site are good but this one is my latest and maybe favorite of the two. After much research I came up with this version.

Here is what I did.

2 Cans Garbonzo beans, rinsed and place in a salad spinner.
3 cloves of garlic, minced (you can add more to your taste. I just don't want it to be overpowering.)
juice of  1-2 lemons, about 1/4 cup (add this to your personal taste. More or less whatever suits you.)
1 tsp. salt
1 (7oz) container of plain Greek yogurt.
3/4 cup Tahini (I have learned to make my own. It is very simple and I will post a recipe soon)
6 Tbl. olive oil
6 mint leaves
4-6 Tbl. water
1/8 tsp. smoked paprika (you can either add it to the recipe or just sprinkle it on top when serving. Since we don't ever just serve a big platter of hummus I chose to add it to the mix.)

Ok, part of what makes a smooth hummus is removing the skins off of the Garbonzo beans. I had no patience for this in the past. Then I watched a video on youtube (love youtube) and a woman had a great idea. She took the cans of beans and poured them into the strainer portion of a salad spinner ( you know the spinner that spins the water out of salad greens.) She rinsed them and then drained them. She then took her hands and gently rubbed the beans together in her hands and the skins sort of just came off. She didn't do it hard enough to mash the beans but enough that most of the skins came off. She then put the strainer into the bowl portion of the spinner and filled it with water. The skins kinda of float to the top. As she tilted the bowl and drained the water she used her hand to just push the skins out of the bowl. I did this twice to get rid of all the floating skins. Then drain the beans and place in a food processor.

Then add the chopped garlic, lemon juice, salt, yogurt, tahini, evoo, mint and blend well. Stopping and scraping down the sides of the bowl. Next to get the consistency you want you will add water. I ended up adding between 4-6 Tbl. Blend well till it is smooth and no more chunks. Then taste for seasoning. Add the paprika if you want and blend again. Or wait and serve it with paprika sprinkled on top and a little olive oil drizzled on it before serving.
Like I said we just grab it right out of the bowl and so I added it.
Everything here is a personal taste thing. You can add more of something or less depending on what you like. I did try adding cumin to this once as cumin is in a lot of hummus recipes and I have always liked it but I like this better without the cumin. My other recipe has cumin in it. This is just a good clean tasting hummus and we enjoy it a lot. 


Wednesday, June 3, 2015

Plain/Vanilla/Unsweetened Almond Milk and Chocolate Almond Milk

                                                    
I'm listing my recipes that I use for both plain almond milk and chocolate almond milk. The plain almond milk is just the recipe I use that is basically the recipe everyone uses. It varies some depending on if you want it thicker or sweet etc....
The chocolate almond milk is soooo good and comes from "Raw Food Real World" recipe book. It is the only chocolate almond milk I have ever made and it is delicious. We always use raw/organic almonds.

Here is what I do: You will need a nut milk bag to squeeze the milk out of after you have blended the almonds. I just don't know of another way that will render you a nice nut milk with no grainy bits. You can buy nut milk bags at any health food store or order them on line. You can use multi layers of cheese cloth in a pinch but the bag is much easier.
You need to soak your almonds in filtered water 12 hours. If push come to shove I will do it in less but 12 hours but 12 hours or over night is optimal. This allows the raw almond to sprout.
Nuts have phytic acid.  Phytic acid is also found in grains and legumes.  Just as with grains and legumes, soaking nuts is essential for proper digestions.  When eating nuts that haven’t been soaked, the phytic acid binds to minerals in the gastrointestinal tract and can not be absorbed in the intestine and to many bound minerals can lead to mineral deficiencies.  By soaking, you are breaking down the phytic acid so it can be absorbed properly.  
Nuts also have high amounts of enzymes inhibitors.  This is another reason why un soaked nuts are hard to digest.  Soaking nuts neutralizes the enzymes allowing for proper digestion. (taken from whole lifestyle nutrition web site.)Take one cup of raw organic almonds and cover them in filtered water at least by one inch. The almonds will soak up the water and plump up. When you are ready to make your milk drain the almonds and rinse them well. Next.......

Plain/Vanilla/Unsweetened Almond Milk: I do not like thick almond milk. Most store bought brands are a little on the thick side for me. Its more like drinking cream than milk. BUT! if you like yours thicker than cut back on the water. (If you want 1/2 gallon then double the recipe. That is usually what I make or I would forever be making almond milk.)
Into the blender place the one cup of soaked almonds with 4 cups of filtered water and blend on high speed till the almonds are completely blended up. About a minute or so. I have a Vita mix. I have never tried this with any other blender so I can't tell you how it would work. I imagine if you have a strong blender it will work just fine.
I then add a pinch (tiny pinch) of salt and literally a drop of vanilla. You can use as much or little of the salt and vanilla as you want. You may also add agave or honey or pitted dates for sweetness if you like a sweet almond milk. I personally don't like it sweet and really don't like but a pinch of vanilla.  Add  1 tsp. to 1 Tbl. of lecithin OPTIONAL. More on Lecithin below. Blend again. Pour into a nut milk bag that is over a bowl and wrapping the top of the bag start to squeeze the liquid out of the bag. Do this till there is nothing but dry almond pulp left in the bag. There will be a little foam on the top. I spoon some of this off but don't usually spoon it all off. Pour into a storage container and place in the fridge. This should last you 3-5 days if kept refrigerated.

Chocolate Almond Milk (Raw Food Real World): double for 1/2 gallon, I always do.
Drain and rinse 1 cup of soaked raw almonds. Place in blender with 4 cups filtered water. Blend till smooth. Pour into nut milk bag and squeeze till all milk is out and nothing but dry pulp is left in bag. Rinse out blender and add the newly squeezed milk back into blender. Add

1 1/2 Tbl. raw cocoa powder (this varies depending on how chocolatey you like it to taste. I like it a little less on the chocolate. The original recipe called for 2 Tbl.)
pink of salt
1/2 cup agave nectar or raw unfiltered honey
1 1/2- 2 Tbl. vanilla (I would say start with 1 Tbl. and add till it tastes right for you. )
1 1/2 - 2 Tbl. coconut oil
1 tsp. too 1 Tbl. lecithin (this comes made from soy or from sunflowers.)
Blend till smooth. I scoop the foam as much as I can and then pour into container and store in fridge for 3-5 days.
The original recipe calls for lecithin. It is used as a fat emulsifier. Making things creamy. It is mostly made of soy beans. We ingest a very limited amount of soy and only organic. Usually oganic tofu for some recipe. Other than that no soy.  If I use it I use only lecithin made from sunflowers.  Research it and if you want to add it you can. Add 1 tsp. to  1 Tbl. to the blender with the rest of the ingredients.
Anyway, thats it. Go and enjoy good home made organic almond milk. For us it is much cheaper to make it. We pay around $10 a pound for organic raw almonds. So compared to the carton it is the better way for us to go, particularly since we haven't found an organic brand of almond milk.

Lets talk Lecithin:
One of the issues with home made nut milks is they separate. The fat from the nut and the water separate into what looks unpleasant (like dairy milk gone bad) There is nothing wrong with the nut milk it just needs a good shake or stir and back to beautiful. BUT, if you want keep it more combined and the fat suspended in the water more like a homogenized nut milk would look then Lecithin is the answer. Lecithin comes in soy or sunflower form. You can buy both GMO free but it is a little harder to find organic. I would say do the research. Lecithin has a lot of wonderful health benefits and I would urge you to also research that as well.
Now there is real debate over the safety of Lecithin during pregnancy and breastfeeding. Two thoughts on this is again is be your own advocate and do the research and also speak with your doctor about it. I know that it being soy or sunflower can make a difference. So I leave you with that choice. 
I would not based on my research be concerned if pregnancy or breastfeeding isn't an issue. I think lecithin is a VERY good and helpful supplement. BUT! You do the leg work and decide for yourself.
Your nut milk will not suffer without it other than the inconvenience of halving to stir it to make it look pretty again.


Tuesday, May 26, 2015

Black Bean Burger

As we try and eat better and try to eat less meat a good burger is necessary. I have always liked vegetarian burgers, so this was easy for me to enjoy.
One of the problems with black bean burgers is they tend to be mushy on the inside. I worked to try and prevent that. There is a fine line with bean burgers between firm and dry. I think these are just the perfect firm burger without being dry.
A very adaptable burger for sure. We don't eat a lot of bread these days but I do make home made hamburger buns to go with our bean burgers. We also do a little cheese with them as well. Everything we choose is organic if possible. Just another way to up the level of goodness these burgers offer.

here is what I did: You can absolutely half this recipe. It makes about 12

4 Cans black beans, rinsed and drained
1 cup raw sunflower seeds
1 cup frozen corn, thawed and squeezed of excess liquid
1/2 cup grated onion
2 cloves garlic grated
2 TBl. minced pickled jalapeno
3 tsp. salt (this seems like a lot but between the beans and bread crumbs the salt is needed)
1/2 tsp. pepper
2 tsp. chili powder
2 tsp. ancho chili powder
2 tsp. cumin
3 Tbl. hot sauce (we use Cholula hot sauce)
4 eggs beaten
2 cups dried bread crumbs
One of the things that makes bean burgers mushy is the moisture in the beans. So after rinsing  them, I placed them on a parchment lined cookie sheet and baked them in a 350 degree oven for about 20 minutes. I stirred the beans about half way through to get the bottom moist beans to the top. If you bake them too long they will dry out too much. Better to under bake them then over bake them. Baking is not necessary it is just how I have found to help the consistency. After baking let cool and then place in a food processor and pulse them till they are large crumbles. Place in a bowl.
 Place the sunflower seeds in food processor and process till small pieces and add to the bowl of beans.
Next add the corn to the food processor and process till small pieces and add to the bowl. Mix the ingredients together and add the onion, garlic, jalapeno, salt, pepper, both chili powders, cumin,hot sauce and stir to combine. Taste for seasoning. It should be slightly salty (this will be ok as we are adding bread crumbs and that will take care of the saltiness)
Next add the eggs and combine, stir in the bread crumbs (the mixture will be very thick. I sometimes just use my hands if it is too hard to stir.) Let mixture set for 5 minutes and then form into patties.
I use a 1/2 cup measuring cup to scoop out the mix and then squeeze the mixture together and then flatten out and form into a patty about 4" in diameter or about 1/2 " thick or so. Place on a plate till ready to fry.
Heat pan on med heat. Add a few Tbl. of oil and when oil is hot add burgers and fry for about 5 minutes. Turn the patty and fry an additional 5 minutes. If using cheese add cheese the last 2 minutes of frying. I cover the pan and let them steam a little to help melt the cheese. The burgers should be nice and crisp. You don't want to try and cook the burgers too fast as they will be crisp on the outside and still have uncooked egg on the inside. Unlike frying beef patties which cook at higher temps, you want to give these plenty of time to cook and get crisp.
I serve mine on home made hamburger buns with lettuce, tomato, raw onions, and smashed avocado that has a little lime and salt mixed in with it. You can of course use any condiment you like.
Enjoy!

Wednesday, March 11, 2015

Vegetarian Mexican Tortilla Soup

This soup is terrific, filling and healthy. It is adapted from "The Food Babe's" recipe. Just like most recipes I take a recipe and then make it my own to suit our tastes. I will give you options in making it healthier if you choose. I also used all organic ingredients where I could.


Here's what I did: (I doubled the recipe)

2 Tbl. extra virgin olive oil
1-2 Cups onion, chopped (I used two small white onions)
1/2 Cup diced cerely
1 Cup diced carrot
2 cloves garlic, minced
1/2-1 cup green lentils, rinsed (the original recipe called for 1/2 cup but I wanted more so I used 1 Cup to make it heartier)
6 Cups vegetable stock
1 (14oz) can or jar crushed tomatoes (mine were chopped not crushed and they broke down just fine)
1/2 jalapeno, seeded and minced
1 tsp. cumin
1/2 tsp. coriander
1/2- 1 tsp. salt (you will taste and adjust seasoning at the end)
1/4 tsp. pepper
1/4 cup chopped cilantro
3 sprouted corn tortillas **( I did not use sprouted corn tortillas as I couldn't find them. I bought a bag of organic white corn tortilla chips and crushed up a hand full to add to the soup. It is important to use organic corn products as almost all corn and corn products are GMO's. If I can find sprouted corn tortillas next time I make the soup I will give it a try. The organic chips worked great though)

In a large pot heat the olive oil up over med heat and add the onions, celery and carrots. Stir and cook till the vegetables are slightly tender. Add the garlic and cook another minute. Next add the vegetable broth, tomatoes, lentils, jalapeno, cumin, coriander, salt, pepper and chopped cilantro. Bring to a boil and reduce to a simmer and cover and simmer 30 minutes or so till lentils are tender. When lentils are tender add a hand full of crushed corn tortilla chips(or the sprouted corn tortillas.) Cover and continue to simmer another ten minutes. The chips should break up and dissolve into the soup and thicken it up some. Taste for seasoning.
Serve with optional toppings of :
tortillas chips
monterey jack cheese (I use pepper jack cheese. Organic or course.)
cubed avacado
additional cilantro

Enjoy!

Monday, March 9, 2015

Individual Cauliflower Pizza

Made this today and this is sooooo good that I just had to put it on here for you all to try. I unfortunately can't remember which web site I found it on to give them the credit they are due for this wonderful recipe. I found it by looking for cauliflower recipes on Pinterest.
We are trying to go 95-100% organic without breaking the bank. This was fairly reasonably priced and very easy to make.

Here is what I did:

1 lg. head cauliflower, shredded. (you need 4 cups. The Cauliflower I used made a smidgen more than 4 cups and I used it all.)
2 eggs, beaten
3 cups shredded mozzarella cheese
salt (optional)
1 tsp. dried oregano
1 tsp. dried basil
2 tsp. garlic powder
1 cup pizza sauce (optional. I did not use it. I just used the slices of fresh tomato)
fresh basil, shreds
12 slices of tomato
1/4 cup Parmesan cheese

Preheat oven 450

using a hand grater, shred cauliflower into crumbles. Measure out 4 cups and place in microwave safe bowl.  I had about 4 1/2 cups and just used it all.
cook cauliflower in microwave for 8 minutes. Stir and let cool 10-15 minutes.
Add salt to taste if using, the 2 beaten eggs, 2 cups mozarella, oregano, dried basil and garlic powder and stir to combine.
 Lightly  grease two baking sheet pans. Divide into 12 balls (I used a 1/3 measuring cup and got 11 and that worked fine) Place spaced out on baking sheets and pat each one down to about 4 inch wide rounds. Bake 15 minutes. The edges will char and this is a good thing as it is very flavorful.
Remove from the oven and turn the oven onto broil. Top each with parmesan cheese, shreds of fresh basil and then mozzarella. Top with slice of tomato. Place under broiler for 3-5 minutes till cheeses are melted and tomatoes are warmed some.

Monday, July 22, 2013

Mung Bean Pasta noodles with Mediterranean artichoke, olive and tomato sauce
Now you can use any pasta you want. We are
trying to eat healthier so I found these fettuccine noodles made from Mung beans and water. Simple and they taste great. They make a wonderful pasta replacement. Here is a link to where they can be purchased. It is a Raw Food web site but you can (and we did) cook the pasta. They soak them for a few days to soften them without cooking them to keep the raw food state of the pasta.
http://www.therawfoodworld.com/index.php?main_page=index&cPath=100148_100540

Ok, so here is the sauce I made to go over the Mung bean noodles.

Mediterranean Pasta with Artichokes, olives, and Tomatoes
Prep: 15 min
Total time: 25 min
Serves 4

Salt and Pepper
12 ounces spaghetti (I used two packages of the mung bean fettuccine and it was 14 ounces all together)
2-4 Tbl. good olive oil
1/2 med onion (I used a whole one) sliced in slivers
2 garlic cloves minced
1/2 cup dry white wine
1 can artichoke hearts (not marinated) rinsed, drained,  and quartered
1/3 cup pitted Kalamata olives, quartered
1 pint grape or cherry tomatoes, halved
1/4 cup grated Parmesan cheese, plus more for serving
1/2 Cup fresh basil leaves, torn into small pieces

In large pot start water boiling and add salt. You will cook the pasta according to directions (for the mung bean pasta, I cooked it for about 6 minutes till I liked the bite it had.  Regular pasta follow directions) when done,RESERVE 1 CUP PASTA WATER FOR THE SAUCE IF NEEDED,  rinse in cool water and set aside to drain.
Now, in a large skillet, heat 1-2 Tbl. olive oil and add onions. Cook for about 3 minutes and then add the garlic. Season with salt and pepper. Cook for a few more minutes and then add the wine. Cook till the wine is mostly evaporated.
Stir in the artichokes and cook for 3 minutes. Add the olives and half the tomatoes. Cook till the tomatoes start to break down. At this point at the cooled drained pasta and the remaining tomatoes, cheese, basil and 2 Tbl. olive oil. Toss to coat the pasta. Add as much reserved pasta water as need to bring the sauce together. You may or may not need it. Stir and toss to coat and heat through.  Serve with additional Parmesan cheese to taste.


Wednesday, September 12, 2012

Pasta with Green Olive Sauce

My husband and I love olives. We really like just about any kind. Black are pretty dull as they aren't full of flavor. We wouldn't turn a black olive away though.  Now I don't know if he remembers but I made this for my Daddy a few times and he loved it. Of course like us he loves olives. I think my husband married me because of this sauce (I'm not sure though.)
Now if you aren't a fan of olives you aren't going to like this. BUT, if you like olives you will love this sauce. It is good.

Here's what I do:
1/4 Cup vegetable broth (or stock)
1/4 Cup Olive oil (extra virgin)
4 cloves of garlic, fine chop
1 Cup PITTED and fine chop green olives (you can mix any variety together. I just would not do straight black olives.)
3/4 Cup toasted bread crumbs (1 Tbl. olive oil to hot pan and add in fresh bread crumbs. Stir till golden and remove from pan.)
 1 lb. spaghetti noodles

Heat olive oil in pan. Add garlic and cook for a minute or so and then add vegetable broth and stir for a minute. Add olives and saute another minute. Add cooked pasta and stir. Add bread crumbs to pasta and mix. If too dry add a little pasta water  and mix. Serve with Parmesan cheese.


Friday, August 31, 2012

Pineapple-Cucumber Gazpacho


You know I never really got the whole Gazpacho thing. To me traditional Gazpacho tastes to much like eating salsa with a spoon. Not my thing. However I have a recipe book that is nothing but Raw vegan recipes. I found this and made it. OMG! this is delish. My mother will make herself sick eating it. She loves, loves, loves this version of Gazpacho. I just can't tell you how good this is. Give it a try. Enjoy! From Raw Food Real World.


Here's what I do:
4 cups chopped peeled cucumber (I like the long English cucumbers.)
4 cups chopped fresh pineapple
1 cup fresh pineapple juice
1 small jalapeno, seeded and diced
1 green onion, white and 1 inch green part, chopped
1 Tbl. fresh lime juice
2 tsp. sea salt (If this seems like a lot of salt it isn't. This is raw food eating and there is not salt. So more salt it needed than you would use if you were cooking with canned products. Trust the salt level.)
1 handful of cilantro leaves
3 Tbl. avocado oil, macadamia nut oil, or cold pressed olive oil (I have always used the avocado oil. You can find this at any health store or Whole Foods, Sprouts etc...) DONT ADD 3 TB. OF EACH OF THESE OILS. PICK ONE TO USE AND USE 3 TBL. OF THAT OIL. THANK YOU, THE END.
1 handful of finely chopped raw macadamia nuts

In a blender add 3 cups cucumber and 3 cups pineapple, pineapple juice, jalapeno, green onion, lime juice, and salt. Blend until smooth. add the remaining 1 cup of pineapple and cucumber, the cilantro, and 1 1/2 Tbl. oil. Pulse a few quick times. The Gazpacho should remain chunky. Taste for seasoning. Place in fridge to chill.
Before serving, add the mad nuts to the soup and stir. Serve in bowl with a drizzle of the remaining oil on top.


Eggplant Balls in Spicy Marinara sauce


This is a really good vegetarian entree. My Sasquatches (I mean kids) even like it. Actually they love this dish. I have been making this for them since they were little Sasquatches. I was vegetarian when my last son was born. He didn't have meat for the first two years of his life. I don't know if I feel sorry for him or not. It took him years to really like meat. He still loves fruit better than just about anything. I serve these in a spicy marinara sauce. It is the only time I make this particular marinara sauce. I don't know why. It just became the sauce I make with these eggplant balls and I never make it for anything else. I dunno. I will list the marinara sauce after the eggplant ball recipe below. Comes from a very old vegetarian cookbook I love called "Claire's Corner Copia"
Enjoy!

Here's what I do:
1/4 cup olive oil
3 cloves garlic minced (I use more almost always)
2 large eggplants, peeled and diced
2 Tbl. water
2 Cups italian seasoned bread crumbs
1/2 Cup minced flat leaf parsley (use whatever parsley you have)
2 Tbl. minced fresh basil
4 oz. shredded mozzarella (optional)
4 eggs, lightly beaten
1/4 Cup parmesan cheese
salt and pepper (to taste)
1/2 flour or more for rolling the eggplant balls in
oil/butter for frying (I use olive oil and butter. You can use whatever oil you want with or without the butter.)
Heat the oil in a pan over med-high heat. Add the garlic and saute for a second and then add the eggplant and stir to coat. Turn pan down to med and  add the water and cover and cook about 20 minutes or so, stirring often till eggplant is very soft. I think I have on occasion added another tablespoon of water if need be. Remove from heat and turn into a bowl. Add the bread crumbs, parsley, basil, mozzarella, eggs, parm and salt and pepper. Stir to mix well. Taste for seasoning. let mixture stand for 15 minutes. Stir again well. You want to break down the eggplant some without turning the whole thing into liquid mush. You can add more breadcrumbs if the mixture is to thin. You should be able to scoop it up and roll into into a ball.
Form into balls and roll in flour and set on a baking sheet. To fry them heat oil and butter in skillet over medium heat and when oil is hot add balls to skillet leaving a little space in between them. Fry on each side till golden brown and remove to a paper towel covered plate to drain. You can bake them if you prefer. 350 degrees for 30 minutes turning halfway through.

Spicy Marinara Sauce

1/2 Cup olive oil
1 small onion chopped
6 cloves garlic minced (I always use more. We love garlic.)
2 (28oz.) cans good italian tomatoes. If they aren't already crushed then crush them before putting them into the pan. (I like the fire roasted myself.)
1/2 Cup fine chop fresh basil
1-2 tsp. red pepper flakes (I add enough as it is cooking till the sauce has some spicy heat.)
salt and pepper to taste

Heat olive oil in pan and add onion. Fry for a couple minutes and then add the garlic. Stir constantly till garlic softens a bit (don't let garlic burn as it gets bitter.) Add the red pepper flakes and stir and then the tomatoes. Simmer for 10 minutes and then add the basil, salt and pepper. Simmer another 10 minutes. Sauce should start to thicken. Taste for seasoning.
Serve over pasta and or eggplant balls.


Wednesday, August 15, 2012

Guacamole

Although its hard to believe based on the temperatures here in Texas. Summer is drawing to a close soon. I for one will be happy to see the cooler weather come back. Or at least as cool as it ever gets here in good ole Texas.
I have been hungry for some Tex-mex and just some summer time foods. I actually am planning a big Tex-mex meal this weekend  with cheese enchiladas smothered in chili gravy, big pot of pinto beans, and Mexican rice. I may or may not grill chicken. I have to see what I feel like. Oh, and of course margaritas. I will post a really easy and wonderful recipe for margaritas later. They aren't the frozen kind but they are delicious and easy because you can make huge batches and you don't have to use the blender.
Anyway, my family is like flies to ......well you know, when it comes to my guacamole. It is a real battle to have enough for dinner time if I make it too early. This isn't a big secret recipe. I have seen everything from guacamole with just mashed up avocados and onion, to some who add in picante sauce (I actually started out making mine that way.) Just like all recipes there is no right or wrong way in my opinion. There is just good. I'm not a food purist. If it tastes good or makes something better then do it. Now I know when to leave a recipe alone as well. I just think its about taste and your food experience. Enjoy it rather than stand on whats right or wrong. Anyway, here is what I do.

Guacamole
4 large ripe avocados.

Everything from here on out is personal choice. You choose how much of each ingredient you like in your Guacamole.
1 jalapeno (stem removed, cut in two and remove seeds and veins. The heat is really in the seed  and veins. So if you remove them you don't have so much fire.) Slice into slivers and then mince.

2 plum tomatoes,  cut in two and with a spoon scoop out all the seeds and wet stuff. After this dice into fairly small pieces.

1/2  a medium onion (use whatever you like, white, yellow, red....) and dice fine

1/2 bunch cleaned cilantro, minced

salt

juice of half a lime

Peel the avocados and place in a bowl. With a fork mash them up as much as you like for your guacamole. Add the rest of the ingredients except the salt and lime. Add the salt last a little at a time till it is salty enough for you. Lastly mix in the lime juice. Taste for salt and of course if it needs more of any ingredient or even more lime. Serve with corn chips.
If you make ahead and want to store in fridge:
I have heard and tried using the avocado seed. Can't say that really worked all that well. What you want to do is cover with Saran wrap. Place it directly on the guacamole and make sure there are no air pockets. Air is what turns it brown as it oxidizes. Place in fridge. When your ready to eat just remove the saran wrap and give it a stir. Taste for seasoning once more and then enjoy.


Monday, February 27, 2012

Lentil Soup


This is my tried and true recipe. I use to make it with meat stock. Now I use vegetable stock. I will give it to you both ways. It is very good and makes a huge amount. We will eat on it for days.
Though this recipe has curry in it it doesn't taste like a curry dish. There isn't enough in there to really make it a curry dish. Just enough to give it that little something extra. It is an important flavor component.

3 large onions, or two large onions and one leek. Doesn't matter. Chopped
4-6 carrots peeled and sliced
2 Tbl. butter (I don't use this in my vegetarian version)
2 Tbl. olive oil. ( use 4 Tbl. in my vegetarian version)
3 (32oz. boxes beef stock.)(I use vegetable stock)
8 cups water (you can use all stock if you prefer
4 Cups dried green lentils, rinsed
4 tsp. dried thyme
1 tsp. pepper
2 tsp. salt
2 tsp. Herbamare vegetable salt (optional)(most grocery stores have this on their spice isle.)
1-2 tsp. curry powder
1/4 cup sour cream (I don't use this in my vegetarian version)
juice of half a lemon (optional)

Place oil and butter (if using) into large stock pot over med-high heat. Add chopped onions/leeks. Cook till the onions start to soften and add the carrots. Continue to cook for another 3 minutes stirring frequently. Add dried lentils and stir. Add stock and water. Then add the dried thyme, pepper, salt, Herbamare seasoning, and curry powder. Stir. Bring to a boil and then reduce heat and cover. Cook till lentils bust open and are tender. Stir frequently as lentils will sink to the bottom of the pan and you don't want them to burn. When they are tender (30-40 minutes) take off the heat and add the sour cream (if using) and add the juice of half a lemon (this is optional. It just brightens the flavors. It isn't necessary though.) Also, season to taste with salt and pepper or more Herbamare.
NOTE: Watch for broth content. Add extra broth or water as necessary. It should be thick but still have a good amount of liquid. You want it like a soup or stew not like a thick mash.
Enjoy!

Vegetarian Asian Lettuce Wraps


 Once again I have to thank The Pioneer Woman for a wonderful recipe. I wish she would share more vegetarian recipes with us loyal followers of hers. She was vegetarian for many years before she met and married her rancher Cowboy. So I'm sure she has a good many delicious recipes. I think I will write her and beg.
I made these tonight for dinner. Not only were they absolutely delish, but they were super fast and easy to make. perfect quick week night meal.
I did change a few things. Mainly just the amounts of seasonings. I will list the recipe as she has it and note my changes. Like everything it is a personal taste decision. Also like most recipes I doubled the recipe for my large family and it pretty much was gone.


I know the pictures aren't that great. But it gives you an idea of what it looked like.

She says this serves 6

2 tsp. peanut or olive oil
1 (12-14 package) extra firm tofu, drained well
1 1/2 Cups frozen corn ( used a little more as I had half a bag left and used it all. It was probably more like 2 Cups.)
1 tsp. chilli powder
1/4 Cup soy sauce (I used 1/4 +1/8 cup Tamari Sauce)
1/2 tsp. balsamic vinegar
Romaine lettuce hearts
sliced avacado

Heat oil in nonstick skillet over med-high heat. Throw in the tofu, break it up into very small pieces. Cook till almost all the liquid is cooked off and it will start to turn a golden brown. The dryer it is the firmer it becomes. I use a potato masher to break it up into small pieces. Works good. Stir it frequently to keep it from sticking. Once it has a little color on it add the corn. Cook and stir till corn is heated up (3-5) minutes. 
Add chili powder and soy sauce. Cook till most of the liquid is absorbed. Turn off heat and add the balsamic. Stir to blend
Pile into romaine lettuce leaves that you have pulled apart. Top with sliced avocado (optional.)

These are just great. We loved it. I'm going to take the filling and incorporate it into a stir fried rice as another optional way to serve. It would be good with some crunchy snow peas in it. The options are endless. We will be making this frequently at our house for the ease and the wonderful flavor.
 Enjoy!


Monday, February 6, 2012

Healthy Mexican Rice


I love this Mexican rice. We serve this with a side salad of choice and it makes a great meal.

2 Tbl. olive oil
1 small red onion, chopped
1 small yellow onion, chopped
3 small bell peppers, seeded and chopped into small pieces
1 carrot, cut into small pieces
10 oz. frozen corn
10 oz. frozen green peas
1 tsp. ( I use more, but I eyeball it.) chili powder
1 tsp. cumin (I use more, but I eyeball it)
3 Tbl. chopped fresh cilantro
10 Cups brown rice cooked with a little Turmeric for color and fluffed.
salt and pepper to taste
optional: tofu cream (drain soft tofu and mash with a sprinkle of cumin and some salt to taste) I top my rice with a little dollop of the tofu cream. You can use sour cream or nothing at all.What ever makes you happy.


Heat oil in large skillet over med-high heat. Add the red onion, yellow onion, peppers, carrot, corn, peas. Stir fry for about 2 minutes. Then add the chili powder and cumin. Cook another 10 minutes or so until veggies are crisp tender. Stir in cilantro, and rice, salt and pepper to taste. Mix well and cook a few more minutes till everything incorporated and heated through.  Taste for seasoning. Serve with Tofu cream and a side salad.

Stir Fried Vegetables over Brown Rice

Not my picture. I just wanted to give you a visual.
I was vegetarian years ago. This recipe was a staple in our weekly menu. I love it. It does use Mango Chutney which has sugar in it. So if you are trying to avoid sugar, you might want to skip this one. It is not one I make a lot now because we are trying to do away with the sugar and processed foods. But once in a while this really hits the spot.

I double the whole recipe for my family. As written it will serve about 4 people.

1/4 Cup toasted sesame oil
3 cloves garlic, chopped
1 tsp. crushed red pepper flakes
one 1-inch piece fresh ginger, peeled, and minced
1 med. red onion, chopped
2 med. carrots, cut in large matchsticks
1/4 small green cabbage, chopped
1 small broccoli, stems separated from florets and chopped. Cut  florets into bite size pieces.
1 yellow bell pepper, cut in half, seeded, then sliced into thin strips
1/4 cup chopped walnuts

Stir fry sauce: (I like this so much that I double it. It is not written in doubled form.)
1/4 Cup Tamari soy sauce
2-4 Tbl. Mango Chutney or honey

Salt and pepper
Cooked brown rice


Heat oil in large skillet over med-high heat. Add the garlic, red pepper flakes, ginger, and onion. Cook, stirring frequently until the onion softens, about 5 minutes. Add the carrots, cabbage, broccoli stems only, and bell pepper. Cook stirring frequently, until the vegetables are crisp tender, about 10 minutes. Add walnuts, broccoli florets, soy sauce and chutney. Cook stirring frequently for 3 minutes. Taste for seasoning. Add salt and pepper to taste. Serve on cooked brown rice.


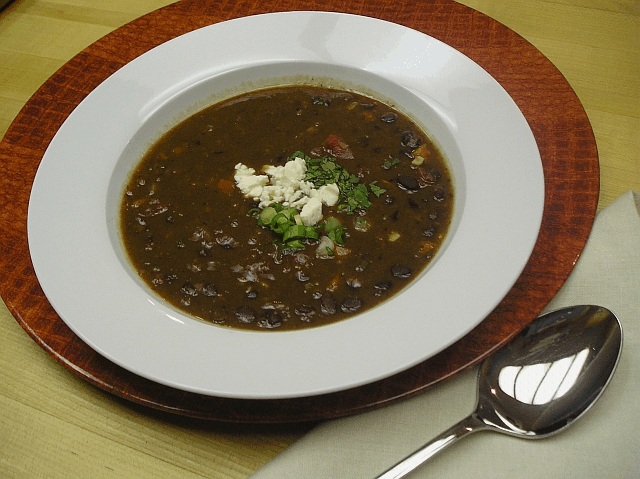
Black Bean Chili


We are trying to eat better after a culinary overload during the holidays. This is a good way to do it. I never miss the meat in chili when we have this. It is very low in fat and high in fiber. It tastes great too. 

Black Bean Chili

4-5 Cups dry uncooked black beans. (Two of the small bags of black beans is what I used.) Rinse and put in large pot and cover with water. Allow them to soak for 4 hours or longer. 
After they have soaked. Pour the beans in a colander and drain the soaking water. Place the drained beans back into large pot and add 8-10 cups of water. Bring to a boil and turn down to a hard simmer and cook till beans are soft. This should take 1-2 hours. When the beans are tender add:

2 Cans chopped Rotel tomatoes
2 Tbl. Cumin
2 Tbl. Chili Powder
2 tsp. Smoked Paprika
2-3 tsp. salt (to taste.)
Allow to simmer while you cook the veggies.

Chop the following:
2 onions
2 bell peppers (I like yellow)
 3 Carrots

2 Tbl. Olive oil
20 garlic cloves, minced
2 Cups frozen corn

To a skillet add 2 Tbl. olive oil and add the onions, carrots and peppers and fry till almost done and add the minced garlic and continue to cook for another minute. Add the corn and cook till corn is thawed and heated through. Add everything scraping the skillet well into the beans. Allow to simmer for another 10-15 minutes. When done add:
1/4 or more chopped Cilantro. Stir well and taste for seasoning.

Monday, January 30, 2012

Baja Black Bean, Corn & Tofu Medley over Brown Rice


After the New Year we were stuffed and sick of all the rich food we had been eating for the previous two months. Did I really say we were sick of the great food? Wait I have to go take my temperature. (Music playing while Kathy takes temperature.)
Ok, I'm back. Yes, we were in real need of some healthy food. So for the time being we are juicing, making green smoothies and eating as close to heart healthy Vegan diet as we can get. 
So here I sit with just a pantry of staples. So this is what I put together and it turned out great if I do say so myself.

3 Tbl. olive oil
2 med. onions, chopped
2 bell peppers, chopped
2 Spoon fulls of jarred, chopped garlic ( probably about 2 Tbl. Who knows how many cloves it would take.That is the nice thing about this recipe. You can put as much as you like.)
1 (10oz.) can of mild rotel tomatoes
3 (15oz.) cans black beans, drained
2-3 Cups frozen corn
1 package extra firm Tofu, drained, and cut into small cubes
1 (10oz) package frozen chop leaf spinach, thawed, drained and squeezed of all its moisture
3/4 tsp. Turmeric
1/2 tsp. cayenne (more or less to taste)
1 Tbl. Cumin (more or less to taste. I just shook it till it looked right.)
1 Tbl. Chili Powder (more or less to taste. I just shook it till it looked right.)
1/2 - 2 tsp. salt, to taste

Cooked brown rice, or Quinoa. 

In a large pan add olive oil. When oil is hot add onions, bell peppers and stir and cook till tender. Add garlic and continue to cook for a minute. Add Rotal tomatoes and stir to heat. Add corn, beans, tofu, and spinach, Stir to break up spinach. Add all the seasonings. Stir to coat and cook for a minute  then taste for seasoning and adjust to taste. Cook for about 20 minutes to blend flavors.
Serve over cooked brown rice or Quinoa


Monday, January 9, 2012

Roasted Garlic and Beet Soup


Ok, We are on this 21 day, post crazy holiday eating for two months cleanse. Meaning we are eating very restricted and healthy vegetarian foods. It has gone well and we have had many benefits from the process. One benefit was this soup. I have never made anything with fresh beets. I can kill some jarred pickled beets off, but never have I used fresh. This has been a learning process. I like regular cooked beets ok, I will eat  them if they are in front of me but have never gone out of my way for plain cooked beets. I was not looking forward to this soup. It was on the menu for our healthy cleanse, so I took the plunge. 
This is sooooo good. Not only is it super healthy but it tastes really rich and yummy. I think it is reminiscent of potato soup. I think mine turned out a little thinner than it was suppose to but I was working with having more beets than the recipe called for but not exact amounts. It was still wonderful. So here it is kids if your looking for a healthy, rich, very tasty soup. I think it would be killer with a great kicked up grilled cheese sandwich sitting next to it. But alas we can't do that right now. But I will!
Also, beet greens are DELICIOUS! I removed those the day before making the soup and cleaned them. Tore them from the center vain and chopped them up for a salad. They are sweet. Not bitter at all. They are very good. Try them out.


Roasted Garlic and Beet Soup: This is suppose to serve 4. On our cleanse it did. Real people may want more.
Makes 4 cups
3 med. beets, washed and ends trimmed.
2 Tbl. olive oil, plus more for drizzling to roast
6 unpeeled garlic cloves
1 large leek, thinly sliced and rinsed of all sand and dirt
1 tsp. fresh chopped thyme leaves
1 bay leaf
3 Cups water
Salt and pepper

Heat oven to 400
tear off big enough piece of foil and parchment paper to encase the beets. Place them on the parchment paper lined foil and drizzle with olive oil. Fold up into a tight package. Bake one hour. Place the garlic cloves on another piece of foil and drizzle with oil. Fold up tight. Put the garlic in the oven 30 minutes after the beets. When done open the packets and let cool. Remove the skin from the beets and cut into fourths and set aside. Squeeze the garlic out of the skin and set aside the garlic. Throw the skins away.
In pot heat 2 Tbl. of olive oil over med. heat. Add leeks and cook, stirring often till tender, 6-8 minutes. Add beets, garlic, thyme and bay leaf. Add 3 Cups of water. Season with salt and pepper.
Bring to a boil and then reduce heat and simmer 10 min. Discard bay leaf. Remove from heat and either ladle into blender and blend till smooth or use an immersion blender and blend till smooth. Season with lots of salt and pepper to taste. 

Friday, December 30, 2011

Tabbouleh Salad


Oh what can I say about Tabbouleh....YUM! This is fresh and green and delish. Make the zucchini burger patties and serve with greek yogurt and tabbouleh salad and you have a great meal. We have ate like crazy people since Thanksgiving and I woke up this morning craving anything fresh and green. So I'm sharing my favorites with you. The more authentic Lebanese recipe has a lot more parsley and a lot less bulgar wheat. This is how we like it. I always double this for my family. It does make a lot though.

Tabbouleh Salad:
1 1/2 cups cracked wheat (bulgur wheat) soaked till soft in 1 1/2- 2 cups boiling water
1/2 Cup chopped green onions
2 -3 diced tomatoes
1 small bunch fresh parsley finely chopped (you don't want huge chunks of parsley.)
2-4 Tbl. finely chopped mint leaves
juice of 1 1/2 lemons
1/2 - 3/4 Cup olive oil
salt and pepper to taste
1 can drained chick peas/garbanzo beans. You can also use pine nuts if you prefer. About 3 Tbl. of pine nuts if using in place of garbanzo beans.
Since this is a salad you can add or subtract to suit your personal tastes. You can also use Quinoa instead of the bulgur wheat if you prefer. Just cook and fluff the Quinoa and add it in instead of the bulgur wheat. I do this a lot and we like it just as much. Some people like diced cucumber in their salad as well. This is versatile and you can add whatever makes you happy.

Place boiling water over bulgur wheat and mix. Leave this sit till the wheat has soaked up all the water. The wheat should be dry and have a al dente bite to it. When all the water is absorbed fluff with fork. While wheat is soaking chop veggies and get everything measured for combining the salad.
When the bulgur wheat is read add in the green onions, tomatoes, parsley, mint, chickpeas. Add oil and lemon juice and mix well. Season with salt and pepper to taste. Cover and place in fridge. The flavors mellow some. This should not necessarily be sour but should have a good lemon bite it. The lemon is the key to the flavor success of the salad. Without it the salad will be mundane. We almost prefer it fresh as the lemon and everything are at their peak in flavor. But it has a wonderful blended flavor as it sits and chills. Stir before serving.

Zucchini Burgers


My family pretty much loves all things. I'm lucky in that. I have been vegetarian off and on for years. I'm loaded with really good recipes. Here is one that we ALL like. Even my extended family likes these. Now these zucchini burgers can be low fat. Course we end up loading them with Ranch dressing or something like that but you can keep the fat numbers down if you choose healthier condiments.

Zucchini Burgers: Makes about 4


2 large eggs
3/4 Cup toasted wheat germ
1/2 Cup shredded reduced fat jack cheese
1/4 cup chopped mushrooms
3 Tbl. finely chopped onion
1/2 tsp each dried thyme, rosemary, chopped into almost a powder
1 1/2 Cups zucchini shreds, (I just shred mine in my food processor using the shredding attachment. Hand shred if you don't have one.)
salt and pepper
plain dried bread crumbs for dredging
oil (for frying. These can be baked as well. )
hamburger buns
tomatoes, lettuce, lowfat plan yogurt mixed with garlic and herbs, or ranch dressing or whatever you like.

In large bowl, beat eggs. Stir in wheat germ, cheese, shrooms, onion, thyme, rosemary and zucchini. Season with salt and pepper. Now if they seem to wet add in some bread crumbs. These should form and hold their shape without falling apart. Make them about 1 inch thick. If they are too loose and liquidy add in a little  bread crumbs till you get a semi dry mixture . If not then form into 4 patties. Then coat in bread crumbs. Heat a little oil in skillet and fry till deep golden brown on both sides, about 4 or 5 minutes per side. You can bake them. I never have so I would guess bake around 350 to 400 and spritz with a little oil to help them crisp up.

Place on buns with whatever makes you happy and enjoy.